Celebration guide
Friendly Monster DIY Cookies: Three Designs for Halloween
Try three friendly monster designs on round cookies: one eye, stripes and a smile, using an understandable icing sequence.
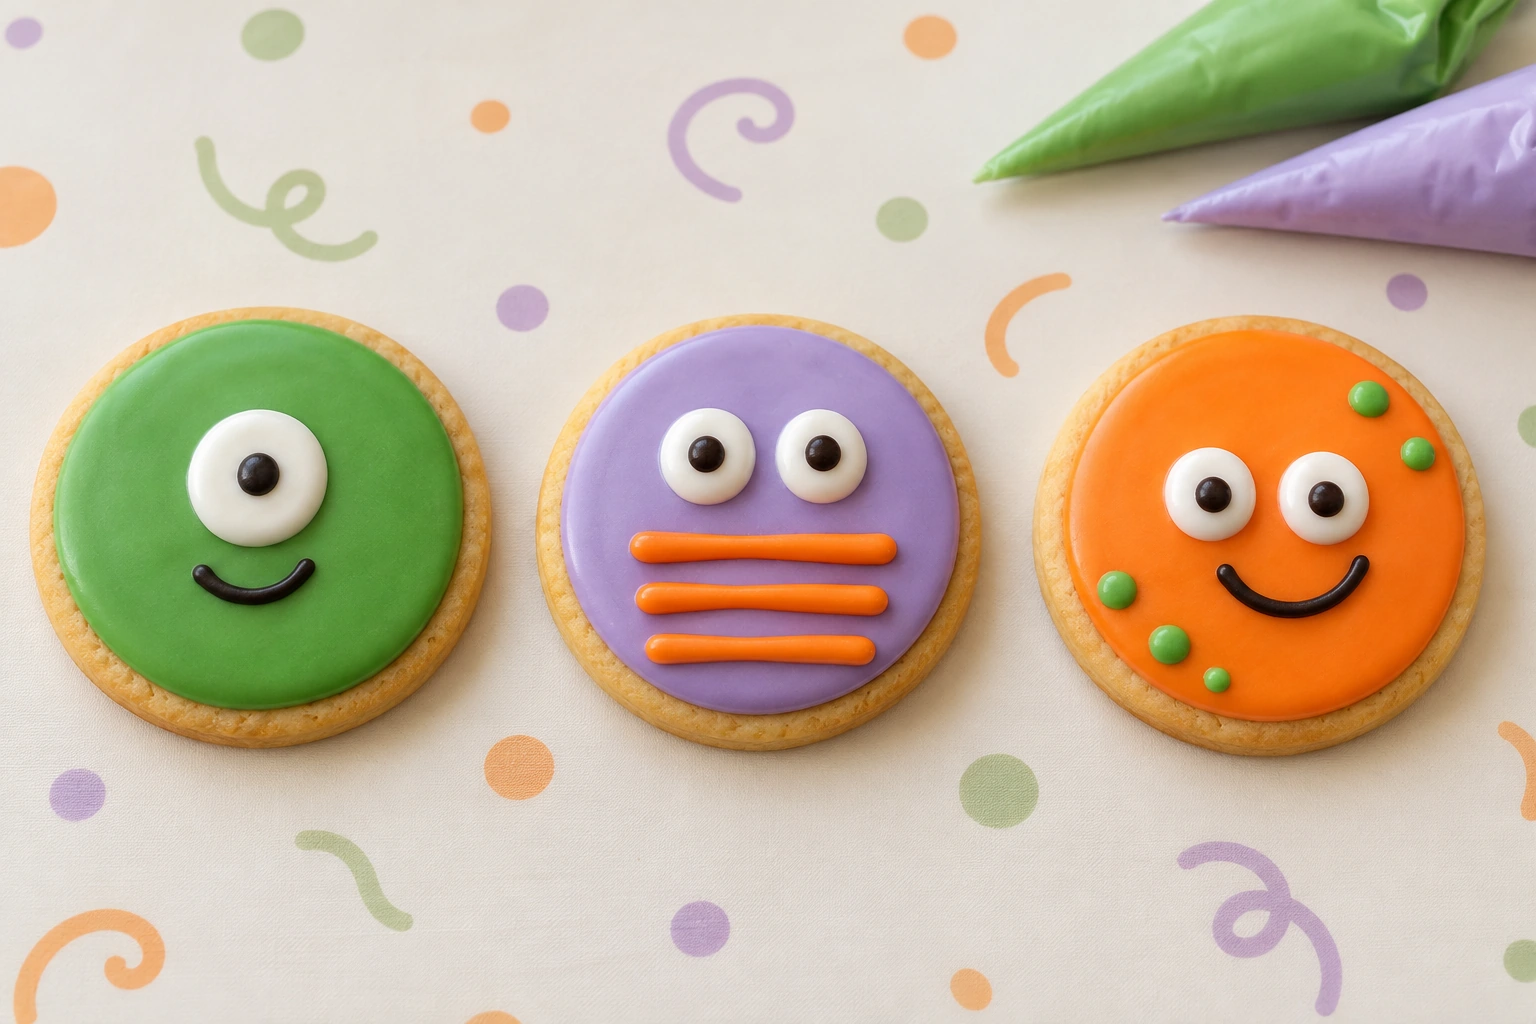
Round cookies can become three friendly monsters through simple patterns: one large eye, repeated stripes or a short smile. Choose one design first and use icing suited to the product. Let the base set sufficiently before adding detail so eyes and lines do not immediately merge.
These are approachable ideas for Halloween without frightening shapes. Kit options, cookie forms, colours and materials still follow the confirmed product. A design idea does not establish that a particular Halloween package is available.
Prepare colours and the working sequence
Use a clean workspace with room for cookies being decorated and finished pieces waiting. Prepare materials according to their instructions. Keep colours limited: perhaps a base colour, white eyes and a contrasting detail colour.
Discuss ingredient requirements before the activity, particularly for participants with specific food needs. A supervising adult can help follow product and tool instructions. Craft-decoration materials should not be used merely because their colours look suitable.
Plan the order: base, setting time according to the material’s condition, then detail. Different icings do not necessarily share one waiting time. Read the surface and product guidance before deciding that another layer can be added.
The one-eyed monster
Begin with green or another chosen base on a round cookie. Leave edge space and level as appropriate to the supported technique. Avoid adding every detail immediately to a surface that is still flowing too freely.
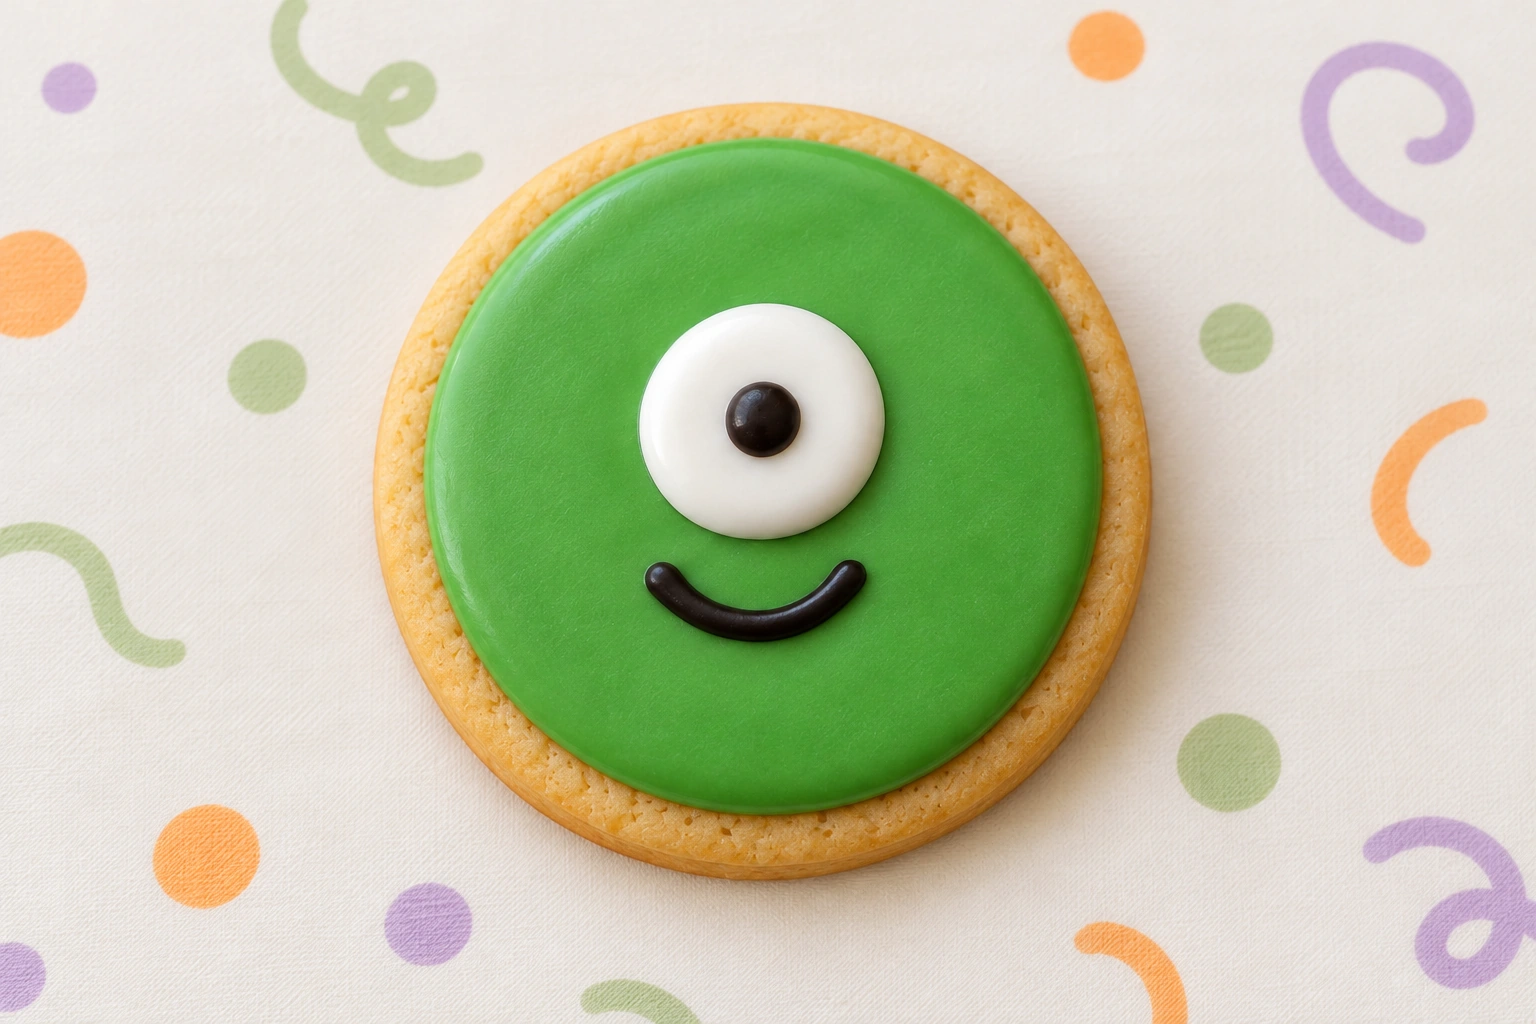
Add one white eye area and then a small pupil when the layers permit. Position it above centre to leave room for the mouth. Simple icing details avoid the need for additional hard decorations unsuitable for the participants.
Make a short mouth. Pupil position and a curved line can already change the expression, so many extra parts are unnecessary. Demonstrate one example, then allow each participant to choose an expression.
The striped monster
Use lilac or another base distinct from the first design. Once sufficiently set, add a few comfortably spaced stripes. They need not fill the entire surface: open areas help the pattern remain readable.
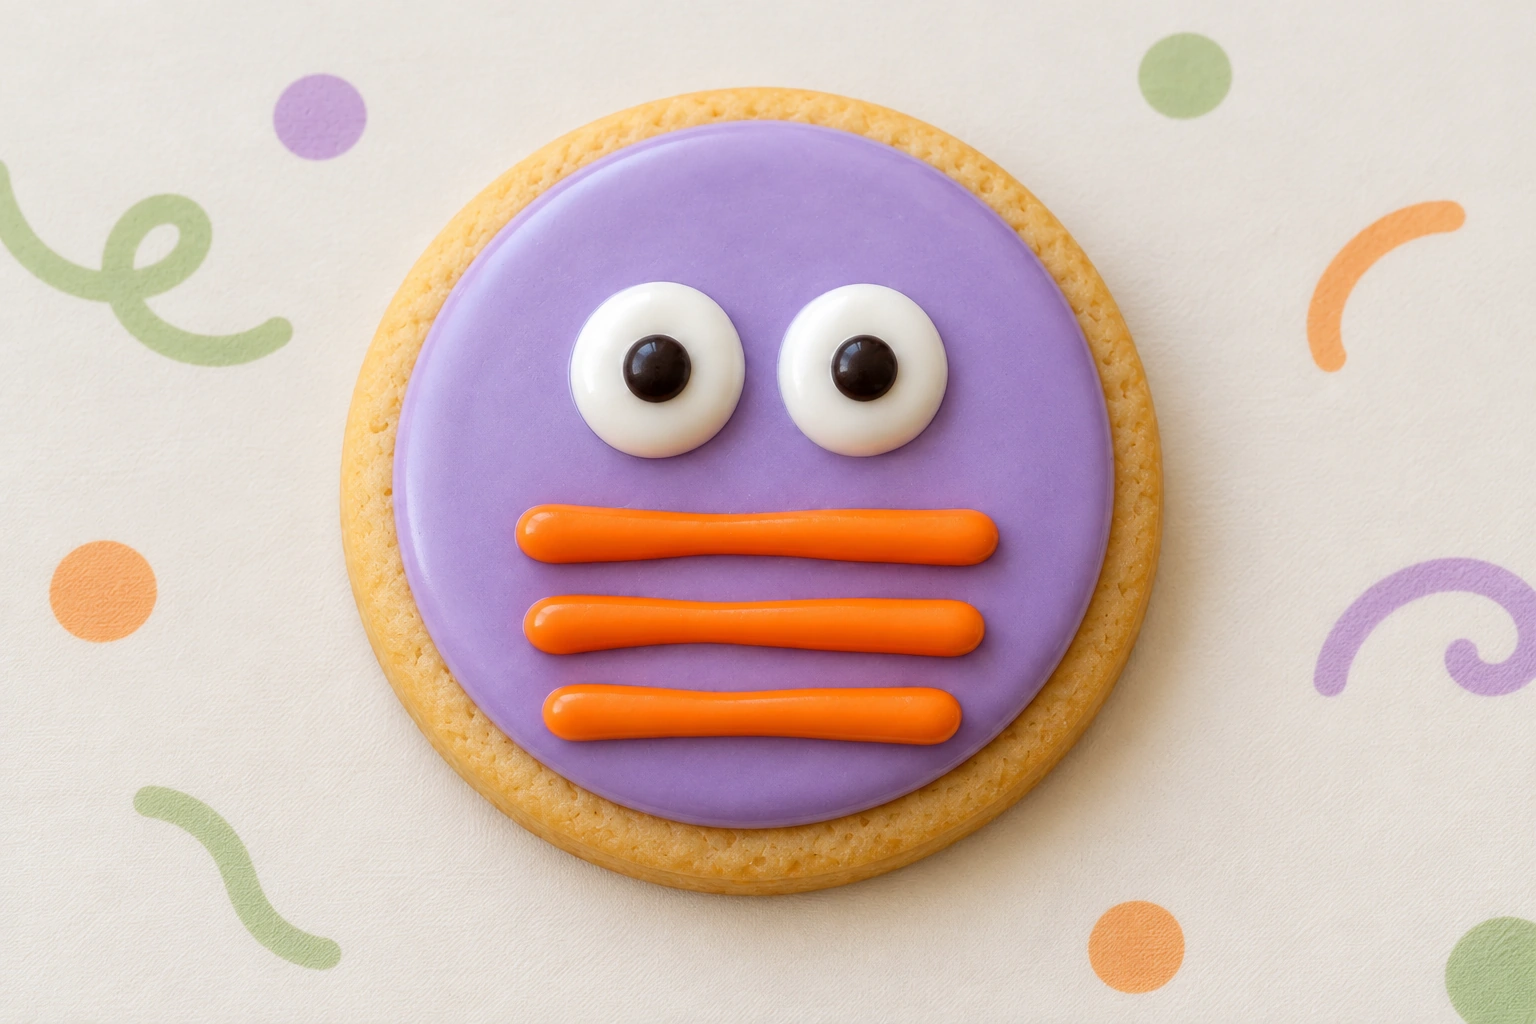
Place two simple eyes in the prepared space. Decide whether stripes sit behind the eyes so the working order is clear. Avoid repeatedly repairing one stripe until the colours become mixed.
For beginners, stripes can be shorter or uneven. The aim is controlled repetition rather than a printed-looking match. Demonstrate one adjustment if the pattern becomes crowded.
The smiling monster
Choose orange or another colour within the palette. Add two simple eyes and a short smile. A few icing dots are optional, but stop before separate details begin covering one another.
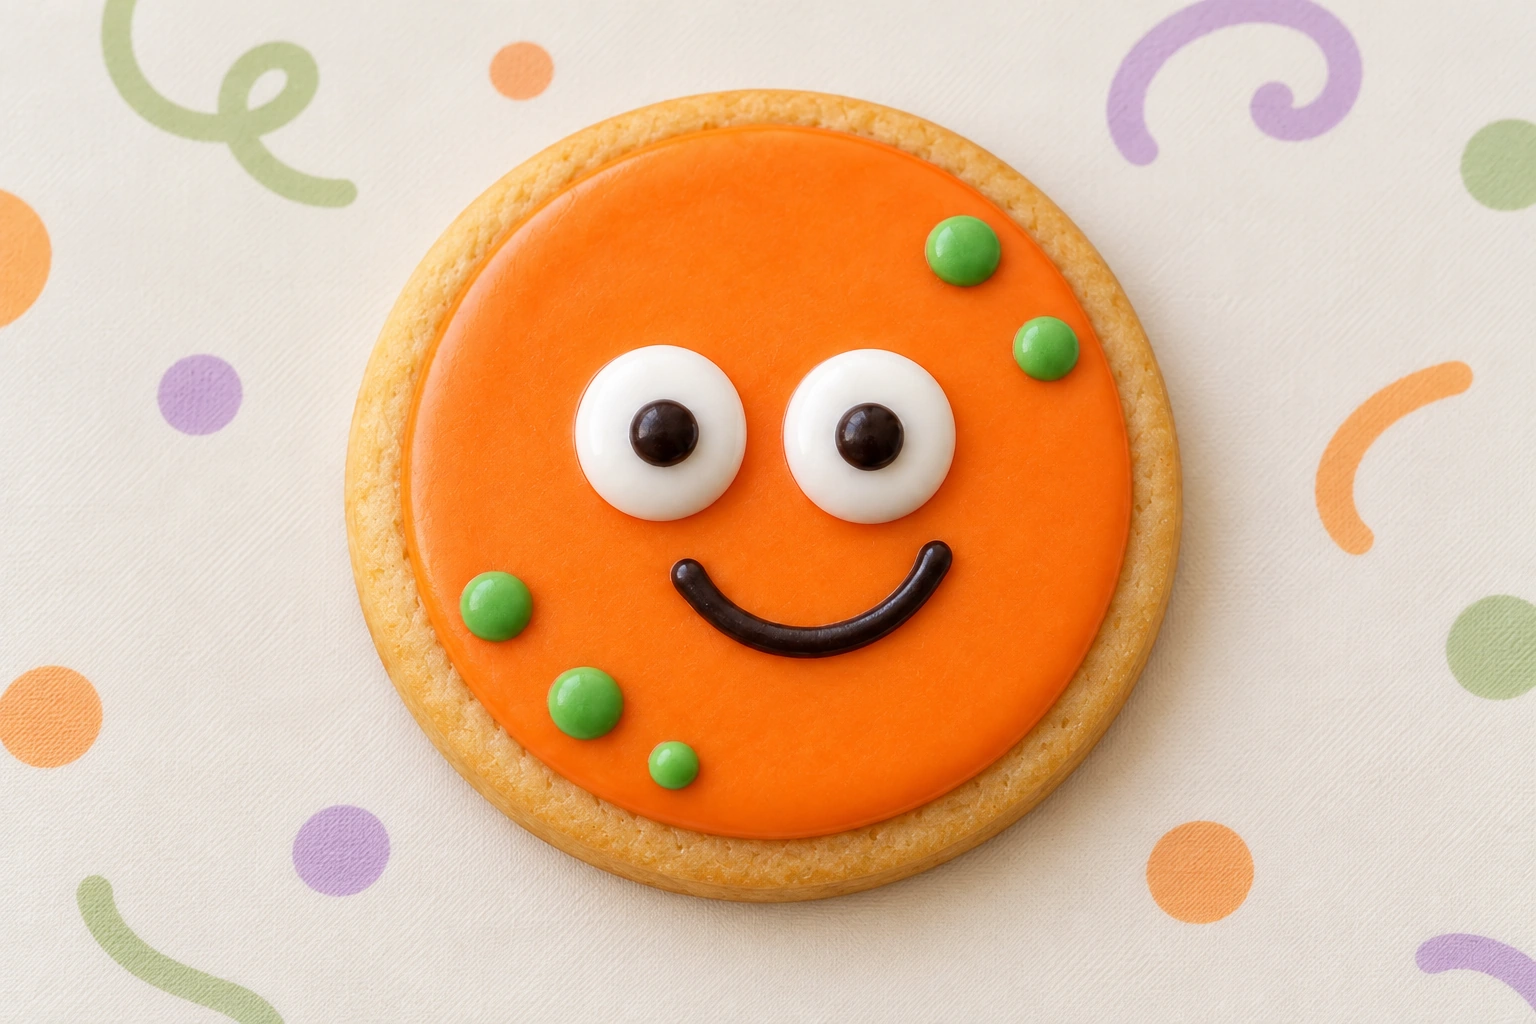
Look from normal table distance. Does the friendly expression already read? If so, a wider mouth or more decoration may be unnecessary. Simple forms are often easier to follow during a shared activity.
This design suits somebody wanting a more compact pattern. The three options are not a competition or a claim that each requires identical skills. Let people choose according to their comfort with the movements.
Compare without changing every material
| Design | Main skill explored |
|---|---|
| One eye | Positioning one main detail and leaving mouth space |
| Stripes | Repeating lines with readable spacing |
| Smile | Arranging few details into a clear expression |
Use similarly shaped cookies for comparison. Changing shape, colour and technique together makes it difficult to understand why one pattern felt easier. Keep a clear example visible without requiring identical results.
Hallmark’s Halloween-cookie ideas show seasonal motifs beginning with simple shapes. Here, the monster designs are activity options rather than a dough recipe or instructions to alter a kit’s composition.
Make room for finished cookies
Move finished pieces to the prepared area and follow icing-handling instructions before packing. Do not stack them merely because the surface appears briefly dry. Mark each person’s space if several participants use similar designs.
For material enquiries, explain participant count, date, preferred shapes and the intended decorating experience. Sweetalicious’s catalogue includes activity kits with icing and sprinkles; confirm contents and themes for your requirement.
Review which movement participants enjoyed before choosing a second cookie. Someone who found long stripes difficult might prefer a simple smile, while another may want to repeat the same pattern. This keeps the activity responsive to the group instead of treating every example as compulsory.
Keep each person’s finished pieces in their space and invite them to explain a colour or expression choice. That conversation can be part of the activity without ranking which monster looks most like the example. It gives individual decisions a place alongside learning the basic movements.
See the DIY-cookie activity guide for table organisation. When contacting Sweetalicious, bring the chosen motifs for discussion. Eyes, stripes and smiles allow variety without making everyone produce the same monster.